Xbox Series X Disc Drive Problems
Nothing is more frustrating than trying to start a game only to find that your Xbox is not working correctly and won’t read your game disc. If your Xbox Series X is not reading discs, we're here to help you figure out what might be wrong and how to fix it.
One of the potential problems is that the disc drive will stop working. There are a variety of things that could cause disc reading issues. We will show you how to figure out your optical disc drive problems using solutions that range from easy to moderate difficulty.
Symptoms
Here are some examples of common disc drive issues.- The disc drive is not consistently pulling in a disc.
- The disc drive does not read the disc correctly.
- The disc drive is not consistently ejecting a disc.
- Some discs play, but others get an error message.
- The disc drive makes a grinding noise when a disc is inserted.
- Something is stuck in the console.
If you are experiencing one of these problems, keep reading for information on fixes you can try. Luckily, many of these issues can be fixed.
First Steps to Fix Your Disc Reading Errors
This is a list of steps to take when trying to diagnose what the problem is. Sometimes the problem is with the disc or discs you are using or basic software issues which are usually not too hard to figure out.
- Check to make sure there isn't already a disc in the drive. First try the eject button. If no disc is ejected but you think there might be a disc (or something else) stuck in the disc drive, get a bright flashlight and look inside the disc drive slot to see if you see a disc inside. If there is a disc inside that won't eject, skip down to the section on how to eject a stuck disc.
- Check to make sure you are inserting the disc correctly into your Xbox so that the artwork is facing up. (Refer to photo below if you're not sure which way is up due to your Xbox being oriented differently.)
- Check if the disc is dirty or excessively scratched. If the disc is too dirty or scratched, the disc drive won’t be able to read it. Clean the disc carefully with a microfiber cloth so you don't cause scratching.
- Test multiple discs to see if it is a problem with only one game or with every game or only with movies, etc. If it's only one disc that doesn’t work, it's most likely a faulty disc rather than a disc drive issue.
- If you are trying to use a Blu-ray disc, you may need to install a separate app. You can download the app by pressing the Xbox button and going to Home > Store. Then search for the Blu-ray Player app and click Install.
- If your Blu-ray disc still isn't working, check that the Blu-ray disc is coded for your region or is coded region-free. Your console can't play discs from other regions.
Easy DIY Fixes
Here are some solutions that we recommend you try next. Whether you have a software problem or an eject problem, one of these options should help solve the issue.
Eject A Stuck Disc
There are two ways to get a disc out once it is stuck in the drive. First, you should try to restart and then eject it as follows.
- Restart the Xbox and press the eject button on the console (next to the disc drive slot).
- If that doesn’t work, press the Xbox button on your controller to open the guide. Select Home then highlight the inserted disc you're trying to eject. Next press the X button on the controller to eject the disc.
If your Xbox freezes or still refuses to eject the disc, hold down the power button on the console until it turns off. Restart the console and try the above steps again. If that still doesn't work you'll need to try ejecting the disc manually using the process below.
The next thing to do is try the paperclip method to manually eject the disc yourself.
- Unplug all power cords and cables from the Xbox console. You do not want it to be on, and you may need to move the console to access the manual eject hole.
- Straighten a large paper clip. It must be at least 2 inches (5 centimeters) long to get the disc out.
- Insert the paper clip into the eject hole on the bottom of the console. (Located along the edge of the round stand by the disc drive as shown in the photo below.) The disc will slightly pop out when the paper clip is pushed into the hole. You can pull the disc out manually with a cloth to avoid causing damage to the disc.

If something besides a disc is stuck in your Xbox, skip down to the instructions on cleaning your disc drive as you will most likely need to take your disc drive apart to remove whatever is stuck inside.
Change the Power Mode
It's possible your power mode settings are interfering with your console's ability to read discs. This isn't super common but it's worth trying this fix to see if it helps. If you are on Sleep power mode, try switching to energy-saving power mode as described here.
- Press the Xbox button on your controller to open the guide.
- Select Profile & system > Settings > General > Power options.
- Select Shutdown (energy-saving) mode.
- Do a hard restart by holding down the Xbox button for 10 seconds.
- Once your Xbox has shut down, press the Xbox button again to start it up.
- Check to see if your discs are now being read correctly.
Do a Console Reset
Another thing to try is to reset the console because this can help fix software problems that may occur. Please note: ((((Warning Resetting your console to its factory defaults erases all accounts, saved games, settings, and home Xbox associations. Anything not synchronized with the Xbox network will be lost. Your console syncs with the Xbox network automatically when it’s connected with the service, so if you've been offline for a while, connect to the Xbox service before taking these steps.))))
- Press the Xbox button.
- Select Profile & system > Settings > System > Console info.
- Select Reset console > Reset and keep my games & apps.
- Once the Xbox completes the reset, sign in and try to play the game disc again.
If you still get an error message or the disc won't read correctly, you can try a factory reset as described below.
Do a Factory Reset
A factory reset erases all user data on the console and sets everything back to factory defaults. It will be just like it was when it was brand new.
- Press the Xbox button.
- Select Profile & system > Settings > System > Console info.
- Select Reset console > Reset and remove everything.
- Once the Xbox completes the full reset, sign in and try to play the game disc again.
If you still have problems with your disc drive after trying a factory reset, your issue is likely a hardware issue. There are some options you can try to fix that issue that we'll cover next.
Medium Difficulty Fixes
Next we'll go over two of the most common causes of hardware issues: a dirty disc drive or a faulty disc drive. Both of these fixes require opening up your Xbox Series X and removing the disc drive.
If you don't have experience with game console repair or don't feel comfortable trying to do these fixes yourself it might be better to send it to a repair shop. A repair shop will cost more than a DIY repair, but not if you make things worse and then have to pay for additional repairs.
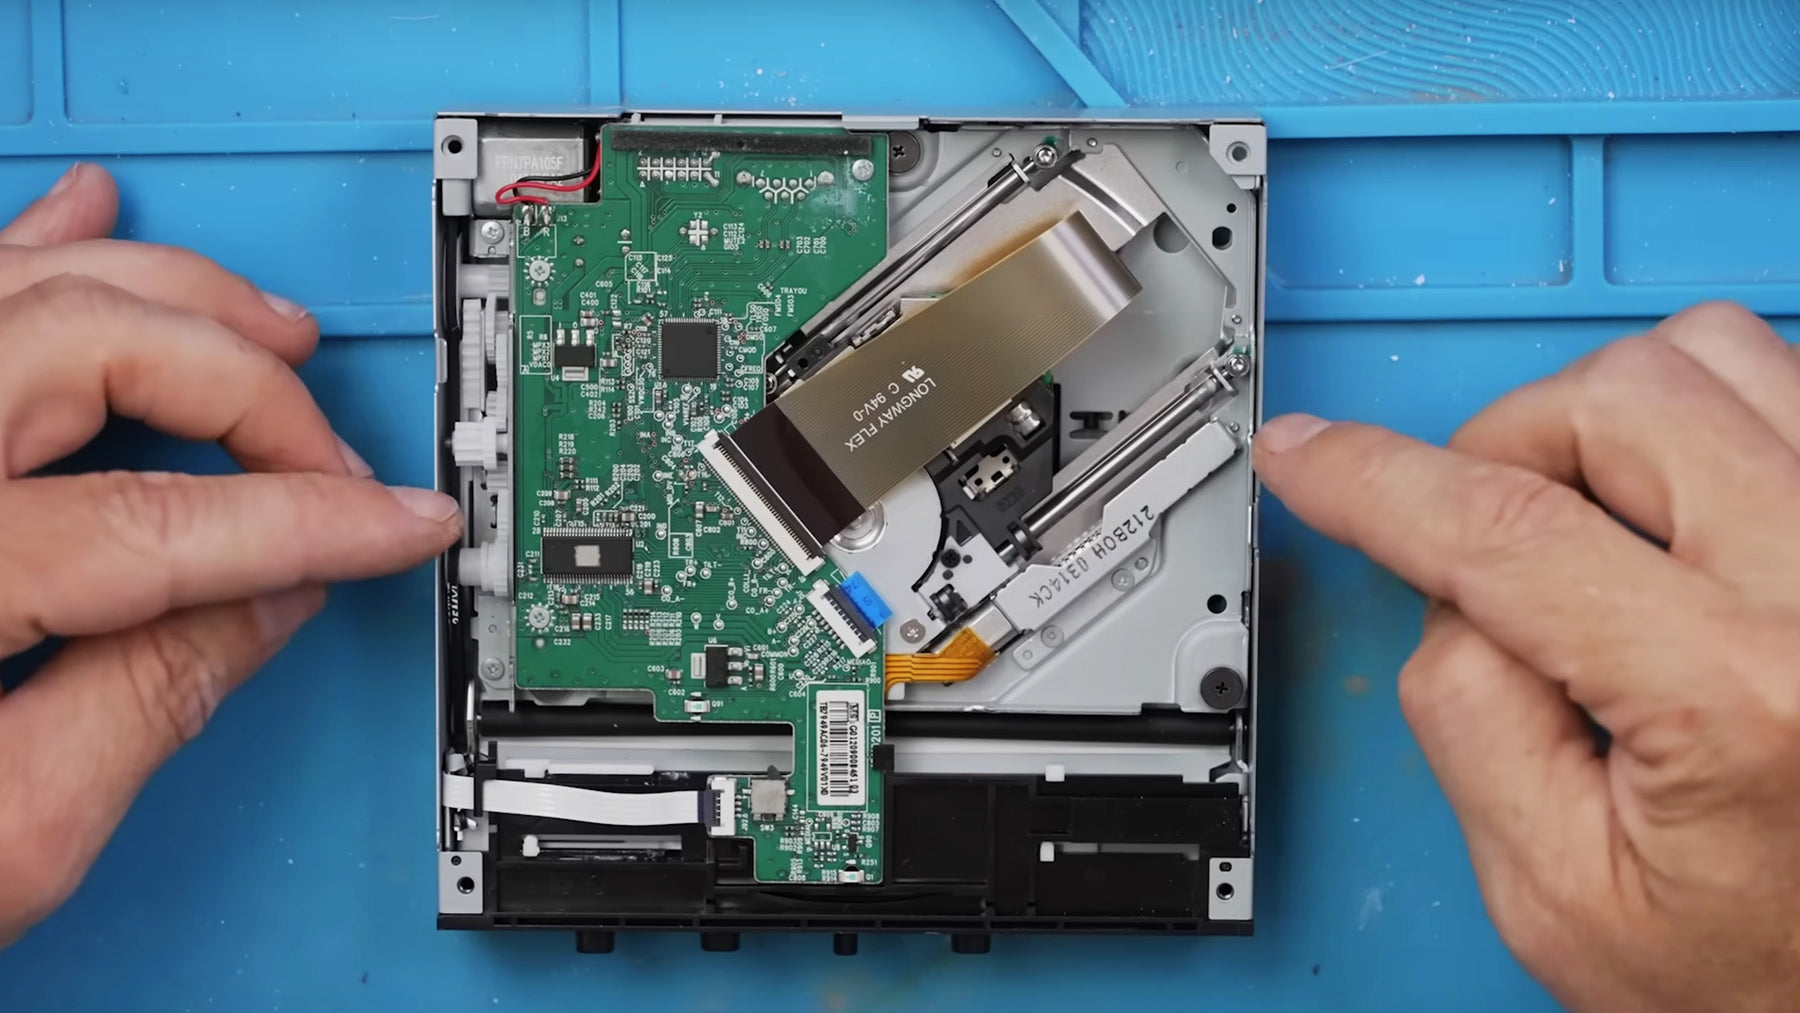
Clean Your Disc Drive
If your Xbox disc drive is dirty inside that can cause it to not work correctly. Below are the basic steps for how to clean your Xbox Series disc drive once you have it out of your game console.
- Remove the screws from the bottom metal plate of the disc drive and open it up.
- Clean the rollers that pull the discs in using rubbing alcohol or IPA and a cotton swab or something similar. (When these get dusty or dirty they don't move discs in or out as well and this can cause problems.)
- Clean any other parts of the disc drive that look dirty. (Using compressed air is sometimes helpful for blowing loose dust and hair out of the drive. Cotton swabs and IPA work well for anything that's more stuck on.)

- Remove the screws and 2 ribbon cables from the circuit board to move that out of the way to check for more dirt and to access the laser if you're wanting to clean that.
- Remove the laser carrier by removing the 3 screws from it and gently lifting it out.
- Clean any dirty areas in this area of the disc drive as well as the laser itself. Be very careful when cleaning the laser. Use IPA or rubbing alcohol and a cotton bud - only using gentle pressure so you don't scratch the laser.
- Put everything back together in the opposite order you took it apart and reinstall the drive into your Xbox.
If you're interested in seeing more of what is involved in cleaning your drive, watch the video linked below. While this video is of Steve cleaning the disc drive of an Xbox One X, there are no significant differences between the disc drives in that model versus the Xbox Series X disc drives.
YouTube Video on How to Clean an Xbox Disc Drive
Optical Disc Drive Replacement
If the optical disc is not repairable, you will need to replace it if you want to be able to play discs in it again. We recommend you have some prior experience with electronics repair before you try to do this yourself. You will also need some tools and parts.
Note: Xbox Series X consoles have a circuit board on the disc drive that is paired with that specific mother board. If you are going to replace the disc drive you will need to keep that same paired circuit board and install in on the new disc drive for it to work correctly.
If you replace the optical disc drive with a different one without installing the paired circuit board, it will not be able to communicate as needed with the console’s motherboard and will therefore not function properly. Sometimes this will result in the console showing an error on the screen. Sometimes the disc drive will just not read a disc or load a game but won’t show an error code.
Here is a guide that walks you through replacing the optical disc drive: iFixit Xbox Series Optical Drive Replacement Guide
And you can watch this video to see Steve working on an Xbox Series X with major liquid damage including a pretty nasty looking disc drive. He shows you how deal with a damaged optical disc drive circuit board and still make it connect with the motherboard.
Additional Help
If your disc drive needs to be replaced but you don’t feel comfortable doing it yourself, you can hire a professional to do it for you. We recommend using Shanefix. They repair many different types of consoles and are great to work with!
Another great resource is the TronicsFix forum, which allows you to interact with a community of video gamers who are interested in repairing their consoles and people with experience repairing game consoles. You can search the questions that have already been asked to see the answers or ask your own questions and get advice on how to fix your specific problem.
About the Authors
 Jocelyn Seaton is a writer for TronicsFix who enjoys helping others learn new things. In her off time you will find her reading and spending time with her family.
Jessica Porter is a digital strategist, video editor, and writer for TronicsFix who uses her love of all things internet to spread more information about fixing electronics. In her off time you will find her enjoying time with her family, exploring various hobbies, and getting plenty of screen time.